docker run -p 8888:8888 jupyter/datascience-notebook
1
2
3
4
5
6
7
8
9
10
11
12
13
14
15
16
17
18
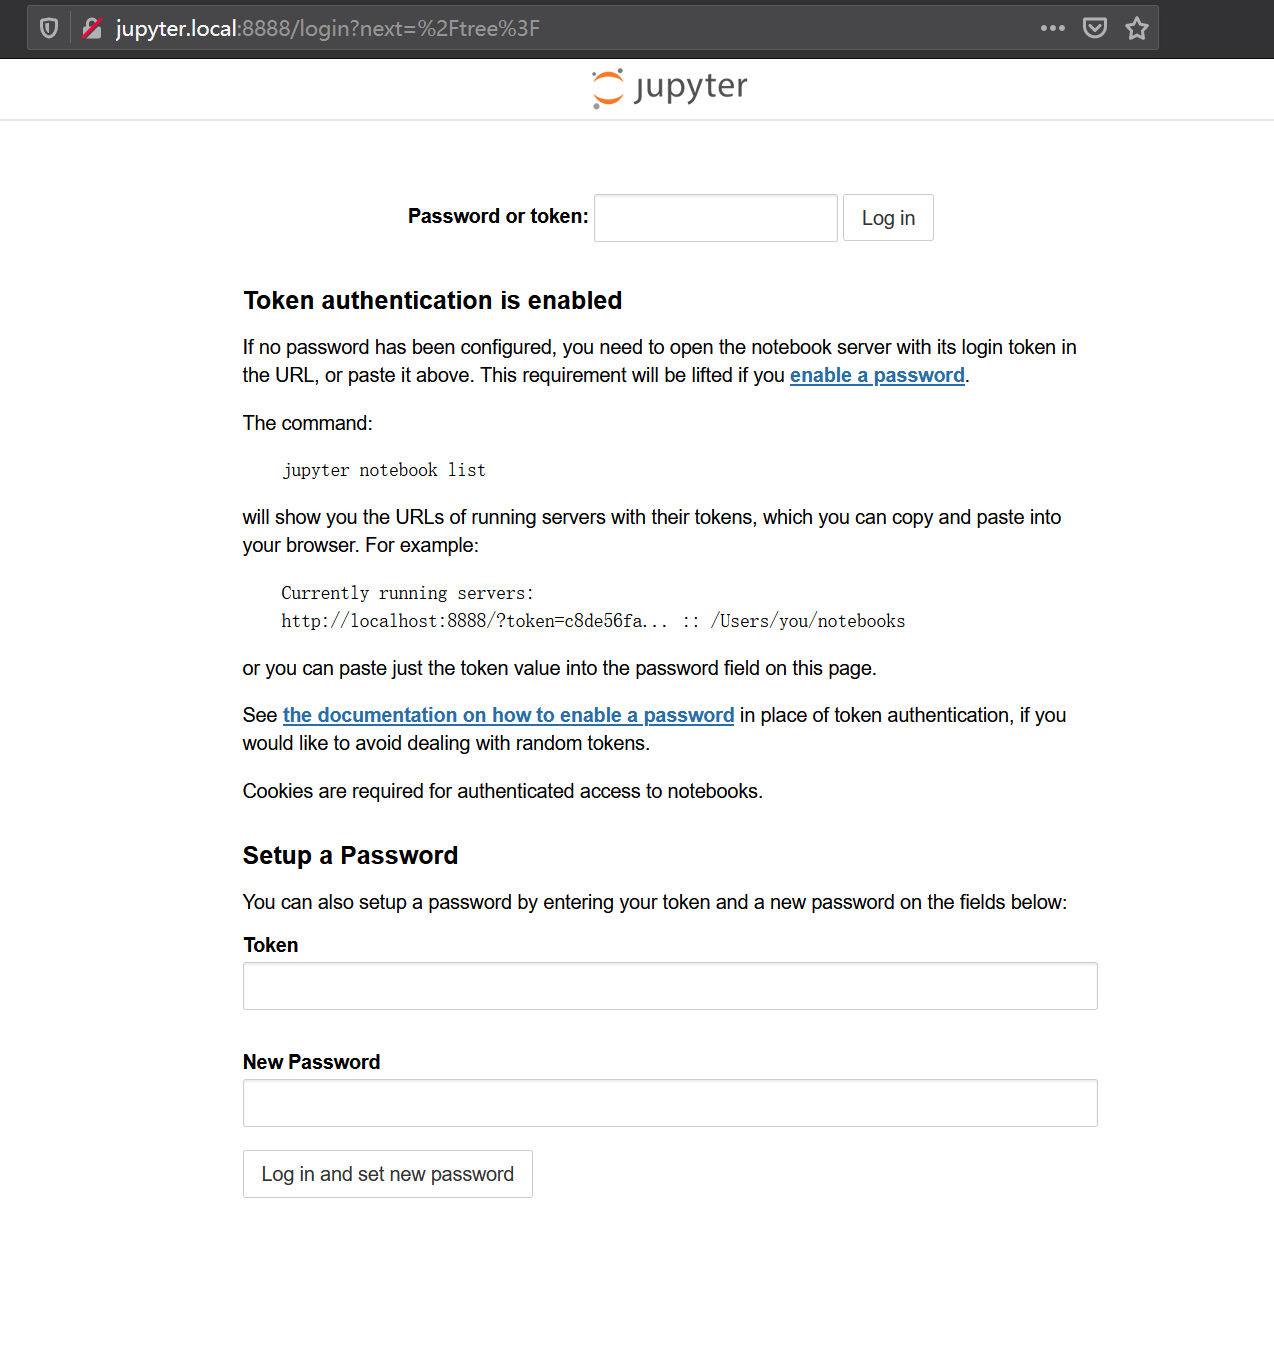
root@ubuntu:~# docker run -p 8888:8888 jupyter/datascience-notebook
Executing the command: jupyter notebook
[I 12:28:00.559 NotebookApp] Writing notebook server cookie secret to /home/jovyan/.local/share/jupyter/runtime/notebook_cookie_secret
[I 12:28:02.995 NotebookApp] JupyterLab extension loaded from /opt/conda/lib/python3.8/site-packages/jupyterlab
[I 12:28:02.996 NotebookApp] JupyterLab application directory is /opt/conda/share/jupyter/lab
[I 12:28:03.006 NotebookApp] Serving notebooks from local directory: /home/jovyan
[I 12:28:03.006 NotebookApp] Jupyter Notebook 6.1.5 is running at:
[I 12:28:03.007 NotebookApp] http://a0a0fecd00d5:8888/?token=2f725d16b757283384db037ff1707b590eca49d9ac037f3b
[I 12:28:03.007 NotebookApp]  or http://127.0.0.1:8888/?token=2f725d16b757283384db037ff1707b590eca49d9ac037f3b
[I 12:28:03.007 NotebookApp] Use Control-C to stop this server and shut down all kernels (twice to skip confirmation).
[C 12:28:03.019 NotebookApp]

    To access the notebook, open this file in a browser:
        file:///home/jovyan/.local/share/jupyter/runtime/nbserver-7-open.html
    Or copy and paste one of these URLs:
        http://a0a0fecd00d5:8888/?token=2f725d16b757283384db037ff1707b590eca49d9ac037f3b
     or http://127.0.0.1:8888/?token=2f725d16b757283384db037ff1707b590eca49d9ac037f3b
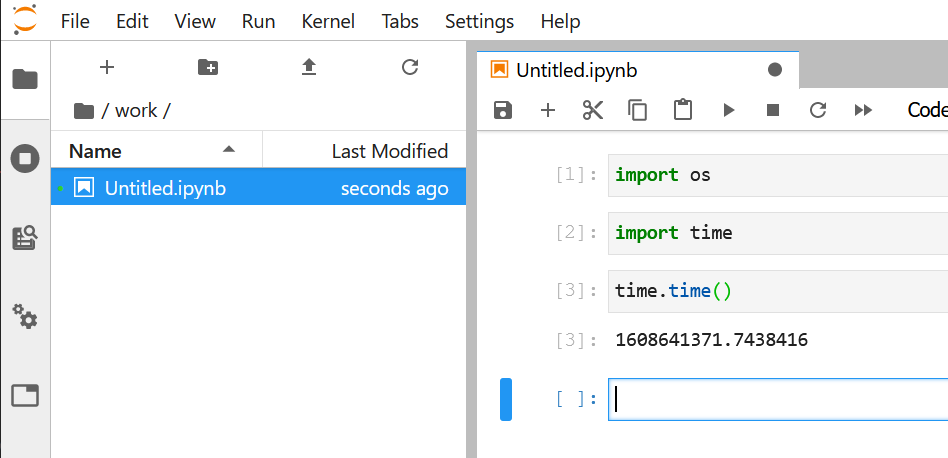
root@ubuntu:/home/naonao# nano docker-compose.yaml
root@ubuntu:/home/naonao# ls
docker-compose.yaml  work
root@ubuntu:/home/naonao# docker-compose up
Creating network "naonao_default" with the default driver
Creating jupyter ... done
Attaching to jupyter
jupyter    | Set username to: jovyan
jupyter    | usermod: no changes
jupyter    | Granting jovyan sudo access and appending /opt/conda/bin to sudo PATH
jupyter    | Executing the command: jupyter lab
jupyter    | [I 12:40:59.811 LabApp] Writing notebook server cookie secret to /home/jovyan/.local/share/jupyter/runtime/notebook_cookie_secret
jupyter    | [I 12:41:00.953 LabApp] JupyterLab extension loaded from /opt/conda/lib/python3.8/site-packages/jupyterlab
jupyter    | [I 12:41:00.954 LabApp] JupyterLab application directory is /opt/conda/share/jupyter/lab
jupyter    | [I 12:41:00.957 LabApp] Serving notebooks from local directory: /home/jovyan
jupyter    | [I 12:41:00.958 LabApp] Jupyter Notebook 6.1.5 is running at:
jupyter    | [I 12:41:00.958 LabApp] http://051c0b8b860b:8888/?token=a37dc92a50b7b6f3fb0f01abfee6a374b5fb74d23a0a3114
jupyter    | [I 12:41:00.958 LabApp]  or http://127.0.0.1:8888/?token=a37dc92a50b7b6f3fb0f01abfee6a374b5fb74d23a0a3114
jupyter    | [I 12:41:00.958 LabApp] Use Control-C to stop this server and shut down all kernels (twice to skip confirmation).
jupyter    | [C 12:41:00.963 LabApp]
jupyter    |
jupyter    |     To access the notebook, open this file in a browser:
jupyter    |         file:///home/jovyan/.local/share/jupyter/runtime/nbserver-14-open.html
jupyter    |     Or copy and paste one of these URLs:
jupyter    |         http://051c0b8b860b:8888/?token=a37dc92a50b7b6f3fb0f01abfee6a374b5fb74d23a0a3114
jupyter    |      or http://127.0.0.1:8888/?token=a37dc92a50b7b6f3fb0f01abfee6a374b5fb74d23a0a3114
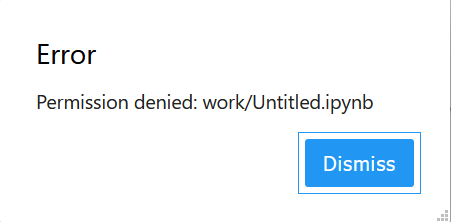
You must grant the within-container notebook userorgroup (NB_UID or NB_GID) writeaccessto the host directory (e.g., sudo chown 1000 /some/host/folder/for/work).